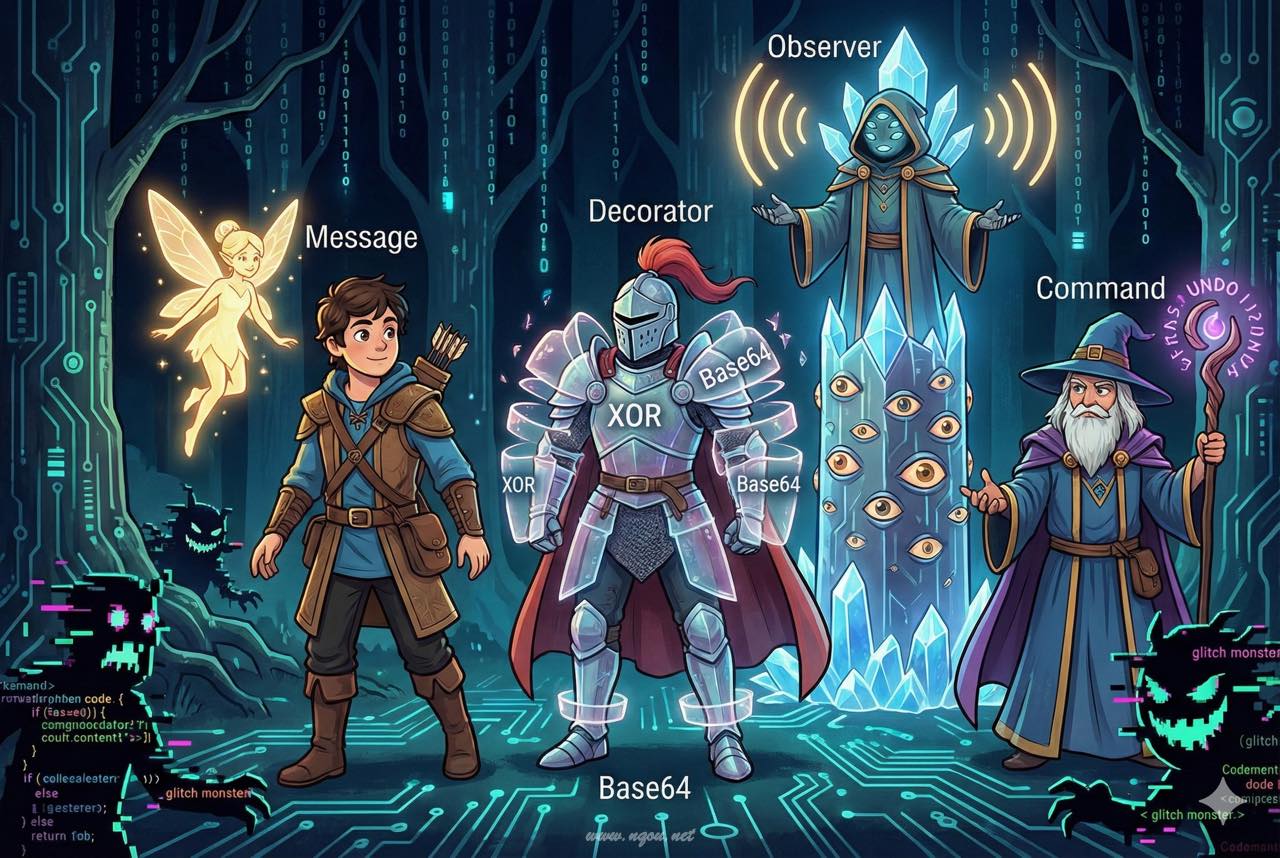
🔐 暗号通信ツールを作りながらデザインパターンを学ぶ
「デザインパターンは知ってるけど、いつ使うかわからない」
「複数のパターンをどう組み合わせればいいの?」
そんな悩みを解決します。この記事では、秘密のメッセンジャーを作りながら、3つのGoFデザインパターンを実践的に学びます。
この記事で作るもの
友人と秘密のメッセージをやり取りできる暗号通信ツールを構築します。
1
2
3
| Alice → [暗号化] → MessageBox → [復号] → Bob
↓
自動通知 & 操作履歴
|
完成形の機能:
- 📩 メッセージ送受信: シンプルなメールボックス
- 🔐 多層暗号化: XOR → Base64 の暗号化レイヤー
- 🔔 自動通知: 新着メッセージ到着時に通知
- ↩️ Undo機能: 送信/削除の取り消し
習得できるパターン
| パターン | 役割 | 本記事での実装 |
|---|
| Decorator | 機能の動的追加 | 暗号化レイヤーの積み重ね |
| Observer | 状態変化の通知 | 新着メッセージの自動通知 |
| Command | 操作のオブジェクト化 | 履歴管理とUndo機能 |
対象読者
- Perlの基本構文を理解している方
- オブジェクト指向の基礎(クラス、継承)を知っている方
- デザインパターンを「使える」レベルにしたい方
技術スタック
1
2
3
4
| use v5.36; # Perl 5.36以降(signatures対応)
use Moo; # 軽量オブジェクト指向フレームワーク
use namespace::clean;
use MIME::Base64; # Base64エンコード用
|
第1章: まずはメッセージを送ろう
今回の目標
MessageクラスとMessageBoxクラスを作成- シンプルなメッセージ送受信を実現
動く:基本クラスの実装
まずは最もシンプルな形から始めましょう。
 1
 2
 3
 4
 5
 6
 7
 8
 9
10
11
12
13
14
15
16
17
18
19
20
21
22
23
24
25
26
27
28
29
30
31
32
33
34
35
36
37
38
| package Message {
use Moo;
use namespace::clean;
has 'sender' => (is => 'ro', required => 1);
has 'recipient' => (is => 'ro', required => 1);
has 'body' => (is => 'ro', required => 1);
has 'timestamp' => (is => 'ro', default => sub { time });
sub format($self) {
return sprintf("[%s] %s -> %s: %s",
scalar(localtime($self->timestamp)),
$self->sender,
$self->recipient,
$self->body
);
}
}
package MessageBox {
use Moo;
use namespace::clean;
has 'owner' => (is => 'ro', required => 1);
has 'messages' => (is => 'rw', default => sub { [] });
sub receive($self, $message) {
push $self->messages->@*, $message;
}
sub get_all($self) {
return $self->messages->@*;
}
sub count($self) {
return scalar $self->messages->@*;
}
}
|
動作確認
 1
 2
 3
 4
 5
 6
 7
 8
 9
10
11
| my $alice_box = MessageBox->new(owner => 'Alice');
my $bob_box = MessageBox->new(owner => 'Bob');
my $msg = Message->new(
sender => 'Alice',
recipient => 'Bob',
body => 'こんにちは、ボブ!'
);
$bob_box->receive($msg);
say "ボブのメッセージボックス: ", $bob_box->count, "件";
|
今回のポイント
Messageは不変(immutable)なデータオブジェクトMessageBoxは単純なコレクション管理- まだ暗号化なし = 平文そのまま
第2章: 暗号化したい!でも…
前章の振り返り
第1章では基本的なメッセージ送受信を実装しました。しかし、メッセージは平文のまま保存されています。秘密のメッセンジャーなのに、これでは秘密になりません!
今回の目標
- XOR暗号を追加しようとする
- 既存コードの変更が必要になり破綻を体験
破綻:既存コードへの暗号化追加
暗号化を追加しようとすると、こうなってしまいます:
 1
 2
 3
 4
 5
 6
 7
 8
 9
10
11
12
13
14
15
16
17
18
19
20
21
22
23
24
25
| package MessageBox {
use Moo;
use namespace::clean;
has 'owner' => (is => 'ro', required => 1);
has 'messages' => (is => 'rw', default => sub { [] });
has 'use_encrypt' => (is => 'ro', default => 0); # 暗号化フラグ追加
has 'encrypt_key' => (is => 'ro', default => 42); # 暗号化キー追加
sub receive($self, $message) {
my $body = $message->body;
if ($self->use_encrypt) {
$body = $self->_xor_encrypt($body); # 暗号化ロジック混入
}
# ... 保存処理
}
sub get_all($self) {
# 復号ロジックも必要に...
}
sub _xor_encrypt($self, $text) {
# 暗号化メソッドがMessageBoxに混在
}
}
|
問題点の整理
| 問題 | 説明 |
|---|
| クラスの肥大化 | MessageBoxが暗号化の責務まで持つ |
| OCP違反 | 新しい暗号方式を追加するたびにMessageBoxを変更 |
| テスト困難 | 暗号化とメールボックス機能が分離できない |
| 再利用不可 | 暗号化ロジックを他で使えない |
OCP(開放閉鎖の原則): 拡張に対して開いていて、修正に対して閉じているべき
今回のポイント
- 「動くコード」と「良いコード」は違う
- 責務の分離ができていないと拡張時に破綻する
- → Decoratorパターンで解決へ
第3章: レイヤーで包もう
前章の振り返り
暗号化を追加しようとしたら、MessageBoxクラスが肥大化して破綻しました。責務の分離が必要です。
今回の目標
- Decoratorパターンを導入
- 暗号化をMessageBoxから分離
Decoratorパターンとは

	classDiagram
    class Encryptor {
        <<interface>>
        +encrypt(text)
        +decrypt(text)
    }
    class NullEncryptor {
        +encrypt(text)
        +decrypt(text)
    }
    class XorEncryptor {
        -key: int
        +encrypt(text)
        +decrypt(text)
    }
    Encryptor <|.. NullEncryptor
    Encryptor <|.. XorEncryptor
    XorEncryptor --> Encryptor : wrapped
完成:Encryptor::Role の実装
 1
 2
 3
 4
 5
 6
 7
 8
 9
10
11
12
13
14
15
16
17
18
19
20
21
22
23
| package Encryptor::Role {
use Moo::Role;
use namespace::clean;
requires 'encrypt';
requires 'decrypt';
has 'wrapped' => (is => 'ro', predicate => 'has_wrapped');
sub process_encrypt($self, $text) {
my $result = $self->encrypt($text);
return $self->has_wrapped
? $self->wrapped->process_encrypt($result)
: $result;
}
sub process_decrypt($self, $text) {
my $result = $self->has_wrapped
? $self->wrapped->process_decrypt($text)
: $text;
return $self->decrypt($result);
}
}
|
XorEncryptor の実装
 1
 2
 3
 4
 5
 6
 7
 8
 9
10
11
12
13
14
15
| package XorEncryptor {
use Moo;
with 'Encryptor::Role';
use namespace::clean;
has 'key' => (is => 'ro', default => 42);
sub encrypt($self, $text) {
return join '', map { chr(ord($_) ^ $self->key) } split //, $text;
}
sub decrypt($self, $text) {
return $self->encrypt($text); # XORは対称暗号
}
}
|
改善されたMessageBox
 1
 2
 3
 4
 5
 6
 7
 8
 9
10
11
12
13
| package MessageBox {
use Moo;
use namespace::clean;
has 'owner' => (is => 'ro', required => 1);
has 'messages' => (is => 'rw', default => sub { [] });
has 'encryptor' => (is => 'ro', default => sub { NullEncryptor->new });
sub receive($self, $message) {
my $encrypted_body = $self->encryptor->process_encrypt($message->body);
# 暗号化はEncryptorに委譲
}
}
|
今回のポイント
- Decoratorは機能を「包む」パターン
- MessageBoxは暗号化の詳細を知らない
- OCP達成: 新しい暗号方式は新クラス追加で対応
第4章: 暗号を重ねる
前章の振り返り
Decoratorパターンで暗号化を分離しました。次は複数のDecoratorを重ねてみましょう。
今回の目標
- Base64エンコード、タイムスタンプ追加など複数のDecoratorを重ねる
- Decoratorの真の威力を体感
動く:Base64Decorator の追加
 1
 2
 3
 4
 5
 6
 7
 8
 9
10
11
12
13
14
| package Base64Encryptor {
use Moo;
with 'Encryptor::Role';
use MIME::Base64 qw(encode_base64 decode_base64);
use namespace::clean;
sub encrypt($self, $text) {
return encode_base64($text, ''); # 改行なし
}
sub decrypt($self, $text) {
return decode_base64($text);
}
}
|
完成:3層のDecoratorチェーン
1
2
3
4
5
6
7
8
9
| # Timestamp → Base64 → XOR の順で暗号化
my $chain = TimestampEncryptor->new(
wrapped => Base64Encryptor->new(
wrapped => XorEncryptor->new(key => 42)
)
);
my $encrypted = $chain->process_encrypt("SECRET MESSAGE");
# → "1738500000|eWt6a256fXd8cXV8Z3lvYmU="
|
レイヤー構成
	flowchart LR
    A[平文] --> B[XorEncryptor]
    B --> C[Base64Encryptor]
    C --> D[TimestampEncryptor]
    D --> E[暗号文]
今回のポイント
- Decoratorはネスト可能
- 組み合わせは無限大
- 各レイヤーは独立してテスト可能
第5章: 新着メッセージを見逃すな
前章の振り返り
Decoratorパターンで暗号化レイヤーを自由に重ねられるようになりました。次は「新着メッセージの通知」機能を追加したくなります。
今回の目標
- ポーリングによるメッセージチェックを実装
- その非効率さを体感
破綻:ポーリング実装
 1
 2
 3
 4
 5
 6
 7
 8
 9
10
11
12
13
14
15
16
17
| package MessagePoller {
use Moo;
use namespace::clean;
has 'box' => (is => 'ro', required => 1);
has 'last_count' => (is => 'rw', default => 0);
sub check_for_new($self) {
my $current_count = $self->box->count;
if ($current_count > $self->last_count) {
my $new_count = $current_count - $self->last_count;
$self->last_count($current_count);
return $new_count;
}
return 0;
}
}
|
問題点の整理
| 問題 | 説明 |
|---|
| リソース無駄 | 定期的にチェックが必要 → CPU/メモリ消費 |
| 遅延 | チェック間隔が長い → 通知が遅れる |
| 負荷 | チェック間隔が短い → 負荷が増える |
| 責務の問題 | メッセージ到着を知っているのはMessageBoxだけ |
今回のポイント
- ポーリングは「プル型」の設計
- 本当に必要なのは「プッシュ型」の通知
- → Observerパターンで解決へ
第6章: 監視者を配置せよ
前章の振り返り
ポーリングによるメッセージチェックは非効率でした。メッセージ到着時に「能動的に通知」してほしいですね。
今回の目標
- Observerパターンを導入
- メッセージ到着時に自動通知
Observerパターンとは

	classDiagram
    class Subject {
        <<interface>>
        +attach(observer)
        +detach(observer)
        +notify(event)
    }
    class Observer {
        <<interface>>
        +update(subject, event)
    }
    class ObservableMessageBox {
        +receive(message)
    }
    class ConsoleNotifier {
        +update(subject, event)
    }
    Subject <|.. ObservableMessageBox
    Observer <|.. ConsoleNotifier
    ObservableMessageBox --> Observer : notifies
完成:Subject::Role と Observer の実装
 1
 2
 3
 4
 5
 6
 7
 8
 9
10
11
12
13
14
15
16
17
18
19
20
21
22
23
24
25
26
27
28
29
30
31
32
33
34
35
36
37
38
| package Subject::Role {
use Moo::Role;
use namespace::clean;
has 'observers' => (is => 'rw', default => sub { [] });
sub attach($self, $observer) {
push $self->observers->@*, $observer;
}
sub notify($self, $event, @args) {
$_->update($self, $event, @args) for $self->observers->@*;
}
}
package ObservableMessageBox {
use Moo;
with 'Subject::Role';
use namespace::clean;
sub receive($self, $msg) {
push $self->messages->@*, $msg;
$self->notify('new_message', $msg); # 通知を発火!
}
}
package ConsoleNotifier {
use Moo;
with 'Observer::Role';
use namespace::clean;
sub update($self, $subject, $event, @args) {
if ($event eq 'new_message') {
my ($msg) = @args;
say "📩 新着: ", $msg->sender, " -> ", $msg->body;
}
}
}
|
使用例
1
2
3
4
5
| my $box = ObservableMessageBox->new(owner => 'Bob');
$box->attach(ConsoleNotifier->new);
$box->receive(Message->new(sender => 'Alice', recipient => 'Bob', body => 'Hello!'));
# → 即座に通知: 📩 新着: Alice -> Hello!
|
今回のポイント
- Observerは「通知」のパターン
- 疎結合: MessageBoxは通知先の詳細を知らない
- 複数のObserverを登録できる(ログ、メール通知、Slack等)
第7章: 操作を記録したい
前章の振り返り
Observerパターンで新着メッセージの自動通知ができるようになりました。次は「操作履歴」と「Undo機能」が欲しくなります。
今回の目標
- ベタ書きで履歴管理を実装
- Undo実装の難しさを体感
破綻:ベタ書き履歴
 1
 2
 3
 4
 5
 6
 7
 8
 9
10
11
12
13
14
15
16
17
18
19
20
21
22
23
24
25
26
27
28
29
| package MessageBox {
use Moo;
use namespace::clean;
has 'history' => (is => 'rw', default => sub { [] });
sub receive($self, $msg) {
push $self->messages->@*, $msg;
push $self->history->@*, { action => 'receive', msg => $msg };
}
sub delete($self, $index) {
my $msg = splice $self->messages->@*, $index, 1;
push $self->history->@*, { action => 'delete', msg => $msg, index => $index };
}
sub undo($self) {
my $last = pop $self->history->@*;
# 問題: アクションごとに異なる処理が必要
if ($last->{action} eq 'receive') {
pop $self->messages->@*;
} elsif ($last->{action} eq 'delete') {
# 元の位置に戻すのが難しい...
splice $self->messages->@*, $last->{index}, 0, $last->{msg};
}
# 新しいアクションを追加するたびにこのメソッドを変更必要
}
}
|
問題点の整理
| 問題 | 説明 |
|---|
| undoの肥大化 | アクション種別ごとに分岐が必要 |
| OCP違反 | 新しい操作を追加するたびにundo修正 |
| テスト困難 | 操作と履歴管理が分離できない |
今回のポイント
- 操作を「データ」として扱いたい
- 各操作に「逆操作」を定義させたい
- → Commandパターンで解決へ
第8章: 命令をオブジェクトに
前章の振り返り
ベタ書き履歴では、新しい操作を追加するたびにundoメソッドを修正する必要がありました。
今回の目標
- Commandパターンを導入
- 各操作を独立したオブジェクトに
Commandパターンとは
	classDiagram
    class Command {
        <<interface>>
        +execute()
        +undo()
    }
    class SendCommand {
        +execute()
        +undo()
    }
    class DeleteCommand {
        +execute()
        +undo()
    }
    class CommandHistory {
        +execute(command)
        +undo()
    }
    Command <|.. SendCommand
    Command <|.. DeleteCommand
    CommandHistory --> Command : manages
完成:Command::Role と実装
 1
 2
 3
 4
 5
 6
 7
 8
 9
10
11
12
13
14
15
16
17
18
19
20
21
22
23
24
25
26
27
28
29
30
31
32
33
34
35
36
37
38
| package Command::Role {
use Moo::Role;
use namespace::clean;
requires 'execute';
requires 'undo';
has 'description' => (is => 'ro', default => '');
}
package SendCommand {
use Moo;
with 'Command::Role';
use namespace::clean;
has 'box' => (is => 'ro', required => 1);
has 'message' => (is => 'ro', required => 1);
has '+description' => (default => sub { '送信' });
sub execute($self) { $self->box->add($self->message) }
sub undo($self) { $self->box->remove_last }
}
package DeleteCommand {
use Moo;
with 'Command::Role';
use namespace::clean;
has 'box' => (is => 'ro', required => 1);
has 'index' => (is => 'ro', required => 1);
has 'deleted_msg' => (is => 'rw'); # Undo用に保存
has '+description' => (default => sub { '削除' });
sub execute($self) {
$self->deleted_msg($self->box->remove_at($self->index));
}
sub undo($self) {
$self->box->insert_at($self->index, $self->deleted_msg);
}
}
|
CommandHistory
 1
 2
 3
 4
 5
 6
 7
 8
 9
10
11
12
13
14
15
16
17
| package CommandHistory {
use Moo;
use namespace::clean;
has 'history' => (is => 'rw', default => sub { [] });
sub execute($self, $command) {
$command->execute;
push $self->history->@*, $command;
}
sub undo($self) {
return unless $self->history->@*;
my $command = pop $self->history->@*;
$command->undo;
}
}
|
今回のポイント
- Commandは「操作」をオブジェクト化するパターン
- 各Commandが自分のundo方法を知っている
- 新しい操作は新Commandクラス追加で対応(OCP達成)
第9章: 完成!秘密のメッセンジャー
前章までの振り返り
3つのパターンを個別に学びました:
| パターン | 解決した問題 |
|---|
| Decorator | 暗号化レイヤーの動的追加 |
| Observer | 新着メッセージの自動通知 |
| Command | 操作履歴とUndo機能 |
今回の目標
完成版アーキテクチャ
	flowchart TB
    subgraph "Decorator (暗号化)"
        E1[XorEncryptor] --> E2[Base64Encryptor]
    end

    subgraph "Observer (通知)"
        MB[SecretMessageBox] --> O1[ConsoleNotifier]
        MB --> O2[LogObserver]
    end

    subgraph "Command (履歴)"
        CH[CommandHistory] --> C1[SendCommand]
        CH --> C2[DeleteCommand]
    end

    User --> App[SecretMessenger]
    App --> CH
    C1 --> MB
    C2 --> MB
    MB --> E1
完成版コード
 1
 2
 3
 4
 5
 6
 7
 8
 9
10
11
12
13
14
15
16
17
18
19
20
21
22
23
24
25
26
27
| package SecretMessenger {
use Moo;
use namespace::clean;
has 'box' => (is => 'ro', required => 1);
has 'history' => (is => 'ro', default => sub { CommandHistory->new });
sub send($self, $sender, $body) {
my $msg = Message->new(
sender => $sender,
recipient => $self->box->owner,
body => $body
);
$self->history->execute(SendCommand->new(box => $self->box, message => $msg));
}
sub delete($self, $index) {
$self->history->execute(DeleteCommand->new(box => $self->box, index => $index));
}
sub undo($self) {
if ($self->history->can_undo) {
$self->history->undo;
say "↩️ Undo完了";
}
}
}
|
デモ実行
 1
 2
 3
 4
 5
 6
 7
 8
 9
10
11
12
13
14
15
16
17
18
19
20
| # 暗号化チェーン: Base64 → XOR
my $encryptor = Base64Encryptor->new(
wrapped => XorEncryptor->new(key => 42)
);
# Bobのメッセージボックス
my $box = SecretMessageBox->new(owner => 'Bob', encryptor => $encryptor);
$box->attach(ConsoleNotifier->new(name => 'Desktop'));
# メッセンジャーアプリ
my $app = SecretMessenger->new(box => $box);
$app->send('Alice', 'こんにちは、秘密のメッセージです!');
# → [Desktop] 📩 新着: Alice
$app->delete(0);
# → [Desktop] 🗑️ メッセージ削除
$app->undo;
# → ↩️ Undo完了
|
まとめ
学んだこと
この記事では、秘密のメッセンジャーを構築しながら3つのGoFデザインパターンを学びました。
	mindmap
  root((秘密の<br>メッセンジャー))
    Decorator
      暗号化レイヤー
      XOR暗号
      Base64エンコード
      タイムスタンプ
    Observer
      新着通知
      ログ記録
      疎結合
    Command
      送信コマンド
      削除コマンド
      Undo機能
      履歴管理
パターンの選択基準
| 状況 | 適用パターン |
|---|
| 機能を動的に追加・削除したい | Decorator |
| 状態変化を複数の場所に通知したい | Observer |
| 操作を記録・取り消し・再実行したい | Command |
次のステップ
- Memento: 状態のスナップショット保存
- Strategy: アルゴリズムの交換可能化
- Factory: オブジェクト生成の委譲
完成コード
本記事のコードは以下で確認できます:
🎉 おめでとうございます!
これで「暗号通信ツールを作った」と友人に自慢できますね。
デザインパターンは使ってこそ身につきます。ぜひ自分のプロジェクトでも試してみてください!